Welcome to this comprehensive guide on creating a zippered pouch, a popular sewing project perfect for beginners and crafty sewists alike. Learn to craft stylish, functional bags with ease!
1.1 Overview of the Project
This zippered pouch tutorial guides you through creating a versatile and practical bag with a professional finish. Perfect for beginners, the project involves cutting fabric, attaching a zipper, and sewing a lined interior. You’ll learn essential sewing techniques, such as aligning fabric, installing zippers, and constructing a durable, stylish pouch. The tutorial covers everything from material preparation to finishing touches, ensuring a rewarding DIY experience for sewists of all skill levels.
1.2 Importance of Learning to Sew a Zippered Pouch
Learning to sew a zippered pouch is a valuable skill for any sewer, offering practical experience with zippers, linings, and professional finishes. It enhances your sewing confidence and opens the door to creating functional, customizable accessories. This project is ideal for mastering essential techniques while producing a useful item for everyday life or as a thoughtful gift. The skills gained are versatile and applicable to more complex sewing projects, making it a rewarding endeavor for crafters of all levels.
Materials and Tools Needed
Gather fabric for exterior and lining, a zipper, and stabilizers. Essential tools include a sewing machine, scissors, pins, and a zipper foot for smooth construction;
2.1 Fabric Requirements
Choose fabrics suitable for your pouch’s intended use. Cotton, vinyl, or recycled materials work well. Select contrasting or matching fabrics for exterior and lining. Medium-weight fabrics are ideal for structure. Ensure fabrics are pre-washed to avoid shrinkage. Measure and cut accurately, considering seam allowances. Use interfacing or stabilizers for added durability. Zipper placement should align with fabric edges for a professional finish. Always cut fabric slightly larger than needed for easy sewing and trimming.
2.2 Zipper Selection
Selecting the right zipper is crucial for functionality and aesthetics. Choose a zipper that matches your pouch size and desired durability. Nylon or metal zippers are popular options, with lengths varying from 6 to 12 inches. Ensure the zipper’s width aligns with your fabric for a professional finish. Use a zipper foot for smooth sewing and proper alignment. Consider decorative zippers or colored pulls for a personalized touch. Always pre-align zipper edges with fabric for seamless integration.
2.3 Essential Sewing Tools
Gather essential tools to ensure a smooth sewing experience. A sewing machine with a zipper foot is vital for precise stitching. Use a rotary cutter and mat for accurate fabric cutting. Rulers and measuring tools help maintain consistency. Pins and clips keep fabric layers aligned. A seam ripper is handy for corrections. Sharp scissors, an iron, and ironing board are must-haves for professional finishes. Optional tools include a walking foot for thick fabrics and a tailor’s ham for curved seams. These tools enhance efficiency and quality in your project.
Preparing the Fabric
Begin by cutting fabric for exterior and lining, ensuring accurate measurements. Stabilize with interfacing if needed. Iron fabrics to remove wrinkles for smooth sewing and professional results.
3.1 Cutting Fabric for Exterior and Lining
Cut two main pieces of fabric: one for the exterior and one for the lining, ensuring they are the same size. Measure accurately, using a ruler or rotary cutter for precision. Iron fabrics before cutting to remove wrinkles. If using patterns, align them carefully for a cohesive look. Cut interfacing or stabilizers to match, enhancing durability. Properly labeled pieces ensure organization for the next steps in sewing your zippered pouch.
3.2 Interfacing and Stabilizers
Interfacing and stabilizers add structure and stability to your zippered pouch. Cut these materials to match your fabric pieces, ensuring they align perfectly. Fusible interfacing can be ironed onto the fabric for a secure bond, while sew-in options require stitching. These layers help maintain the pouch’s shape and prevent stretching, especially around the zipper area. Choose the right weight based on your fabric type for a professional finish. Properly applied interfacing enhances durability and ensures a crisp, polished appearance.

Attaching the Zipper
Attach the zipper by placing it right side down on the fabric edge, aligning the zipper tape with the fabric’s edge. Sew in place using a zipper foot, ensuring precise alignment and smooth stitching for a professional-looking pouch.
4.1 Placement and Alignment
Begin by laying the exterior fabric right side up. Place the zipper right side down, aligning its edge with the fabric’s top edge. Ensure the zipper pull is positioned at one end for easy access. Pin the zipper securely, making sure it’s centered and evenly aligned. Use a zipper foot for precise stitching, maintaining a consistent seam allowance. Proper alignment is crucial for a professional finish and smooth zipper operation.
4.2 Sewing the Zipper
Attach the zipper foot to your sewing machine for precise stitching. Place the zipper along the top edge of the exterior fabric, aligning the zipper tape with the fabric edge. Sew across the zipper, backstitching at the start and end for durability. Ensure the stitching is straight and catches both the zipper and fabric evenly. Avoid sewing over the zipper pull; instead, move it out of the way as you sew. This step secures the zipper in place, ready for the next phase of construction.
4.3 Tips for Smooth Zipper Installation
For a seamless zipper installation, use a zipper foot to stitch close to the teeth. Align the zipper tape edge with the fabric, ensuring straight placement. Backstitch at the start and end for durability. Avoid sewing over the zipper pull; instead, move it aside as you sew. Press the fabric after attaching the zipper to flatten layers. Using interfacing or stabilizers can add structure and prevent stretching. These tips ensure a professional-looking zipper installation every time.
Sewing the Pouch

Place exterior and lining pieces right sides together, ensuring the zipper is centered. Sew sides and bottom with a 1/4-inch seam allowance. Backstitch for durability. Press seams flat for a professional finish.
5.1 Constructing the Pouch Body
Place exterior and lining pieces right sides together, aligning the zipper at the top center. Sew sides and bottom with a 1/4-inch seam allowance, backstitching at the start and end for durability. Ensure the zipper is centered and secure during sewing. After sewing, press all seams flat to achieve a crisp, professional finish. This step forms the basic structure of the pouch, preparing it for further details like adding lining or embellishments.
5.2 Sewing Side and Bottom Seams
Align the fabric edges and pin them securely. Sew the side and bottom seams with a 1/4-inch allowance, backstitching at the start and end for strength. Press the seams flat to create a crisp finish. Ensure the zipper remains centered and secure during sewing. This step ensures the pouch’s structural integrity and prepares it for adding lining or embellishments, maintaining a professional appearance.
5.3 Boxed Corners for a Professional Finish
Boxed corners enhance the pouch’s appearance by creating a sharp, defined shape. Trim excess seam allowance at each corner, then fold the fabric to form a square; Press the fold to create a crisp edge. Sew along the folded edge, ensuring straight stitches for a polished look. This technique adds durability and a professional touch, making the pouch more structured and visually appealing. It’s a simple yet effective step to elevate your handmade pouch.
Adding Lining
Add a lining to your pouch for a finished interior. Sew the lining fabric separately, then attach it to the exterior, ensuring seams are properly caught.
6.1 Sewing the Lining
Sew the lining by placing the lining pieces right sides together. Use a 1/4-inch seam allowance to sew sides and bottom, leaving a small opening for turning. Backstitch at the start and end for durability. Press seams with a hot iron to create a crisp fold. Ensure the lining mirrors the exterior pouch shape for a professional finish. This step prepares the lining for attachment to the exterior fabric in the next stage.
6.2 Attaching the Lining to the Exterior
Place the exterior and lining pieces right sides together, aligning edges carefully. Sew around the top opening, leaving a small gap for turning. Use a 1/4-inch seam allowance and backstitch at the start and end. Turn the pouch right side out through the opening, press seams flat, and hand-stitch the gap closed. Ensure the lining is fully enclosed and the pouch lies flat for a polished finish.
Finishing Touches
Add a professional finish by neatening seams, topstitching edges, and ensuring all layers are secure. These steps enhance both functionality and the pouch’s polished appearance.
7.1 Topstitching
Topstitching adds a polished finish to your zippered pouch. Sew visible stitches along the edges using a contrasting thread for a decorative touch. Ensure the stitches are evenly spaced and aligned. This step helps the seams lie flat and enhances the pouch’s professional appearance. Use a zipper foot for precise stitching and press the fabric beforehand for crisp results. Topstitching is optional but highly recommended for a clean, tailored look.
7.2 Trimming Seams
Trimming seams is essential for a neat finish. Use sharp scissors or a rotary cutter to carefully cut excess fabric, leaving a 1/4-inch seam allowance. Be cautious not to cut too close to the stitches. This step ensures the pouch lies flat and prevents bulky edges. Press the seams open before trimming for accuracy. Trimming is especially important around curved or angled areas to achieve a smooth, professional result. It enhances both the appearance and durability of your pouch.
7.3 Turning the Pouch Right Side Out
Carefully turn the pouch right side out through the opening in the lining. Use a blunt object like chopsticks or a pencil to push out corners gently. Ensure all edges are smooth and even. Check for any fabric bunching or tucking, especially around the zipper. Press the pouch with an iron to flatten seams and restore shape. This step is crucial for achieving a professional finish and ensuring the pouch looks polished and well-constructed.
Variations and Customization
Explore creative ways to personalize your zippered pouch by adding pockets, using contrasting fabrics, or incorporating decorative elements like tabs or embroidery for a unique touch.
8.1 Adding Pockets or Compartments
Add functionality to your zippered pouch by incorporating pockets or compartments. Use contrasting fabrics for a pop of color or add small pockets for organization. This enhances usability and personalizes the design. You can sew internal or external pockets, depending on your preference. This step allows you to tailor the pouch to specific needs, such as separating items or adding a dedicated space for small accessories. It’s a great way to maximize space and create a more practical accessory.
8.2 Embellishments and Decorative Elements

Elevate your zippered pouch with creative embellishments. Add fabric patchwork, iron-on designs, or vinyl accents for a personalized touch. Embroidery, appliques, or decorative stitching can also enhance the design. Consider adding small hardware like charms or straps for a polished look. These elements make the pouch more visually appealing and reflective of your style. Use contrasting fabrics or bold patterns to create a striking aesthetic. Decorative elements can transform a simple pouch into a unique, eye-catching accessory.

Measuring and Sizing
Determine the perfect size for your zippered pouch by following standard measurements or adjusting dimensions for specific uses. Proper sizing ensures functionality and a professional finish.
9.1 Standard Measurements
Standard measurements for zippered pouches vary, but common sizes include 7-9 inches in width and 5-7 inches in height. Finished sizes often range from small coin purses (4×6 inches) to larger utility pouches (12×10 inches). When cutting fabric, ensure accurate alignment of the zipper tape edge with the fabric’s top edge. A 3/8-inch seam allowance is typical. For professional results, consider consulting patterns or tutorials for precise measurements tailored to your project’s needs;
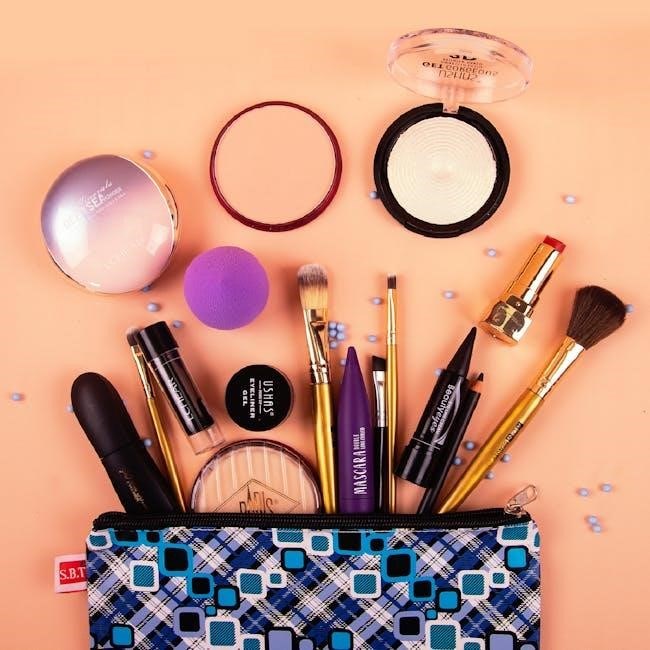
9.2 Adjusting Size for Different Uses
Adjusting the size of your zippered pouch allows it to suit various needs. For smaller items like coins or keys, opt for dimensions around 4×6 inches. Makeup or small electronics fit well in 7×5-inch pouches, while larger items like tablets require 10×8-inch sizes. Thicker fabrics may need slightly larger measurements to accommodate seams. Proportional scaling ensures functionality and aesthetics, whether you’re making a petite coin purse or an expansive travel pouch. Modify dimensions based on intended use for a tailored, professional finish.
Congratulations! You’ve successfully completed the zippered pouch tutorial. This project is a great way to practice essential sewing skills while creating a practical and stylish accessory. Whether for personal use or as a gift, your pouch can be customized to fit various needs. Experiment with different fabrics, sizes, and embellishments to make each piece unique; With these skills, you’re ready to tackle more sewing projects and create even more functional and beautiful items for everyday use.